It just so happened that said kitchen was not Food Night’s home kitchen, but rather the kitchen at Dr. Tom’s pad in Minneapolis. And it just so happened to be served the same night as …
Thursday, September 6, 2012
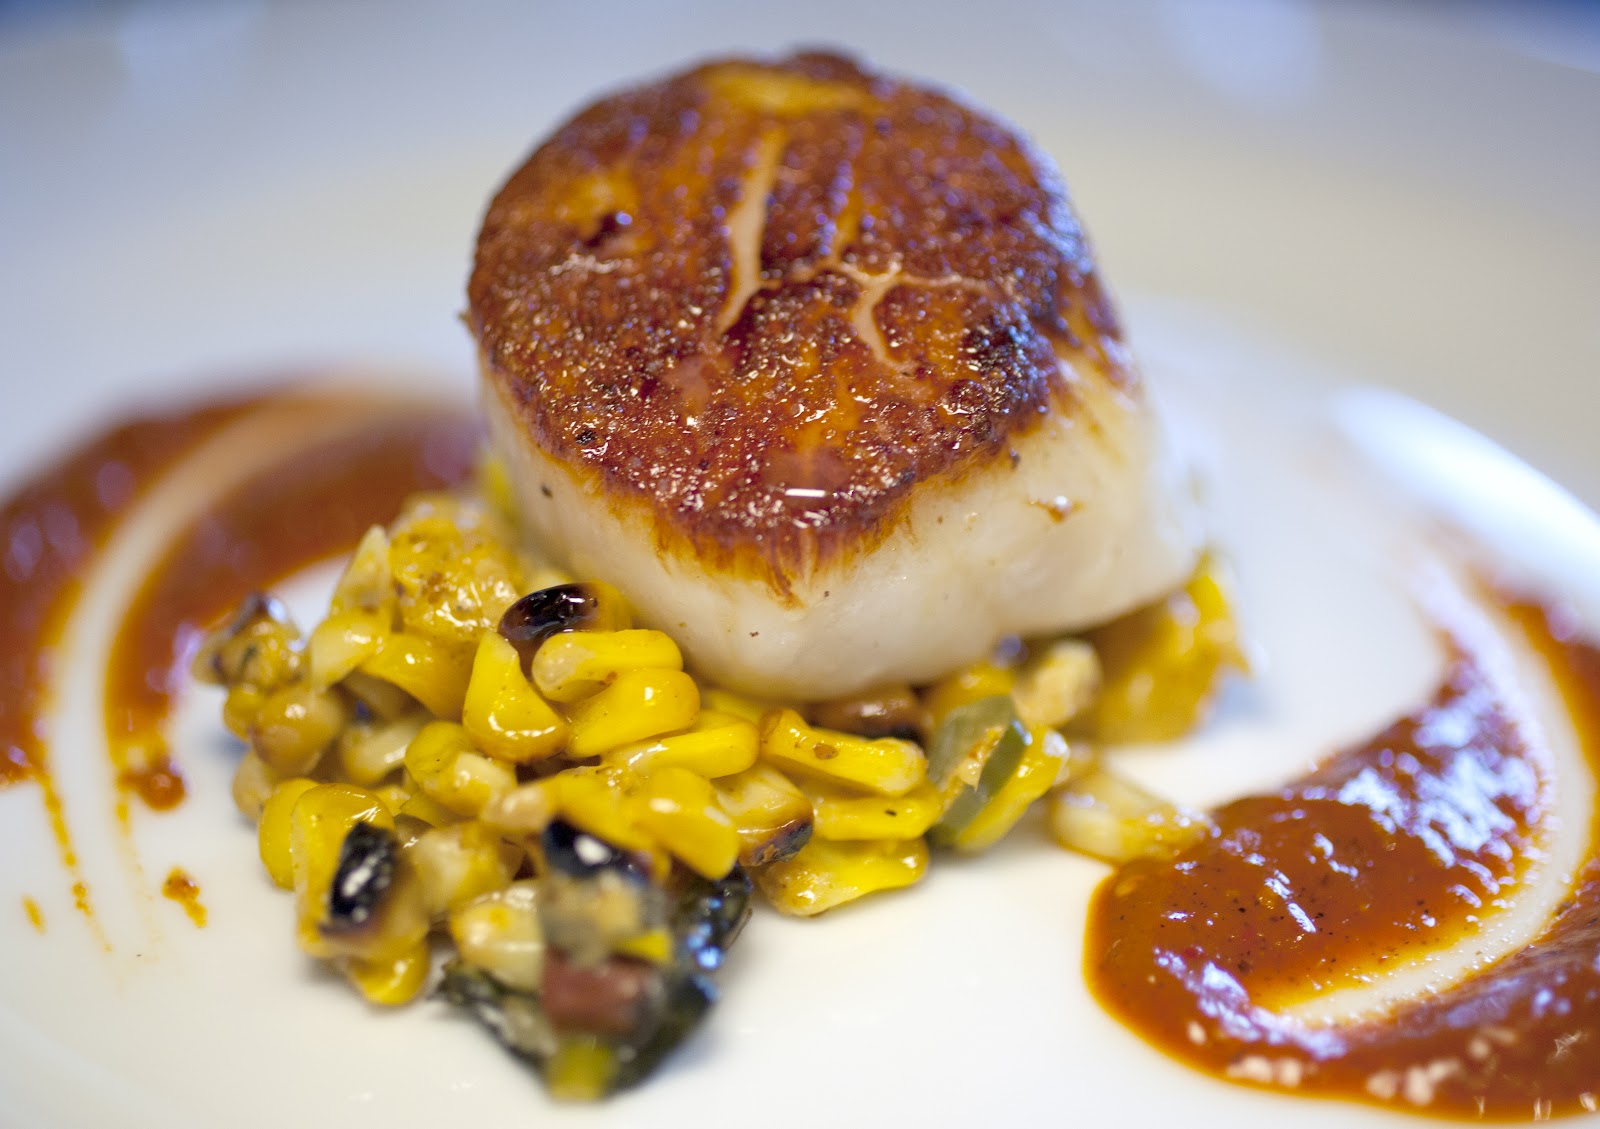
Grilled Corn Agnolotti
It just so happened that said kitchen was not Food Night’s home kitchen, but rather the kitchen at Dr. Tom’s pad in Minneapolis. And it just so happened to be served the same night as …
Friday, July 20, 2012
What is Food Night?
So, what exactly is Food Night? The Host had a conversation with his uncle while sitting at the bar of a local restaurant, and the topic of Food Night came up for some reason. Uncle James has been a huge inspiration in the Host’s culinary pursuits, and they dine together on a frequent basis. Between bites of the most delicious, salty, crispy, moist chicken, James chimes in that… “Any night can be a Food Night. Heck, this right here is a Food Night”.
And that’s a distinction the Host had lost track of. There need not be a formal occasion to enjoy a proper meal and/or bottle with the right people. Food Night happens whenever, and for whatever reason. With the right people, or with no people. Food Night can be you on your patio on a Tuesday night with an ear of grilled corn and a Pabst. That’d be a helluva Food Night, actually.
So when Friend of Food Night Dr. Tom sent the Host a text that read “Any interest in a Food Night at my place on Friday August 10th?“… the Host’s one word answer was…
Yes.
Food Night perseveres.
Thursday, April 12, 2012
Olive Oil Poached Salmon
Well, here’s why not…. if you gently poach fish in the oven in a film of olive oil, you get these white coagulated protein globules on the surface of the fish. Totally edible and harmless, yet not the most appealing thing to look at. The fix? Brine. Brining the fish for 20 minutes in a 10% brine keeps the coagulated globules at bay. And that’s really where all globules belong, isn’t it? At bay.
Olive Oil “Poached” Salmon
Serves 2
For the Brine
*Please use Kosher. But you knew that already.
For the Salmon
- Two 6oz pieces of Coastal Seafoods Organic Scottish Salmon.* Thicker the better. Skin and pin bones removed
- Olive Oil**
- Several sprigs Fresh Thyme
- 1 Garlic clove, peeled
*The salmon really is the key to this dish (go figure, right?). As such, make sure it is QUALITY salmon that is fresh, never frozen. If you are lucky enough to live in the Twin Cities, go to Coastal Seafoods. Period. And if it happens to be Copper River Salmon season, or other Insert-River-Name-Here Salmon season, those are great options too.
** Two 6oz fillets in an 8’’ pan will require a max of 4 tablespoons of olive oil. Not (NOT!) a quart. Or 6 cups. Or any other such insane quantity.
1). Brine the fish for 20 minutes. Make sure the fish is completely submerged in the brine, weighing it down with a plate if needed.
2). While the fish is in the brine, preheat oven to 250 degrees. Film an oven going skillet with enough olive oil to cover the bottom of the pan. The 8’’ skillet should be large enough, especially if your salmon fillets are thick, but upsize to a 10’’ or 12’’ if your fillets won’t fit in the pan without overlapping. Add the thyme and garlic, and gently begin warming the pan over med-low heat when the fish has about 5 minutes left in the brine.
3). After 20 minutes, remove fish from the brine and pat thoroughly dry. When the oil is warm, place the brined and dry fish into skillet (skin* side goes down). There should be NO sizzling sounds when the fish hits the pan. If there is, allow oil to cool a bit and try again.
*Well, where the skin used to be, before it was… skinned.
4). Place the pan in the oven. Give the fish a nudge (or gently shake the pan) to make sure it isn't sticking to the pan. Again, at no time should the fish be sizzling, the idea here is a gentle poach. Remove pan from the oven when the bottom of the fish is cooked, and the top is still raw. Approximate cooking time should be around 8ish minutes, but will of course vary with the thickness of the fish.
5). Once you remove the pan from the oven, tilt it to one side and use a spoon to baste the fish with the warm oil.
Perhaps put the thyme on top of the salmon to help the warm oil extract it’s thymey goodness. The idea is to just barely cook the top of the fish. Once the top of fish is uniformly opaque, it’s done. Serve (as pictured below) with sautéed crispy kale, or your favorite veggie accompaniment.
Thursday, January 19, 2012
The Food Night Cheeseburger
But before we get into the how-to, let’s go over the fundamentals. Food Night’s Four Burger Commandments, if you will (and even if you won’t);
1). CAST IRON. It’s how Food Night cooks burgers. Grilling is great of course, particularly in the summer, but try cast iron. Mkay? A pan costs $18 and lasts for life. Or longer.
2). FAT. Moderation makes every good thing better by preserving its “wow” factor. Not this gal’s version of moderation, but ACTUAL moderation*. If you are going to make a burger… make a REAL burger. Don’t make some 95% lean crumbly dry beef frisbee. Fat is part of a proper burger. And as such, there will be fat in this recipe. Do not be afraid. Embrace it, and treat yourself once in a while, in moderation.
*Food Night is obviously not happy about anyone’s misfortune… but it kiiiiiiinda seems like Paula Deen contracting Type 2 Diabetes is about as surprising as getting wet while taking a shower. If Food Night is remembering things correctly, “gluttony” is one of the Seven Deadly Sins, while “moderation”… is not.
3). THE ENGLISH MUFFIN. Can you use your favorite hamburger bun instead? Of course. Will it be as good as an English Muffin? No. Get a nice thick English Muffin like Wolferman’s, available at Kowalski’s in the Twin Cities. Brands like Thomas and Crystal Farms are great for toasting and holding your favorite morning preserves… but will fail miserably as a burger delivery system.
4). GARNISH. Quality Triple Cream Cheese and pickles. The End. Nothing else. Bacon, ketsup, mustard, mayo, lettuce, tomato, fried egg, foie gras… all wonderful things. All don’t go on this burger. Food Night uses a super delicious Delice de Bourgogne, also available at Kowalski’s. You want a cheese that isn’t overly salty (there is plenty of salt in the burger already), and has some ripeness/acidity/tartness that will cut through the richness of the burger. The Delice de Bourgogne is a fabulous choice.
The Food Night Cheeseburger is rich, decadent, and delicious. Please do not operate heavy machinery after consumption, as the consumer of said cheeseburger has a tendency to nap shortly after consumption. Kinda like this guy.........
The Food Night Cheeseburger
Serves 4
For the Cheeseburger
1lb ground beef (80% lean, at most)
4 egg yolks
3T butter
1 medium shallot, finely diced
1T fresh tarragon, finely chopped(optional, but encouraged)
Kosher salt
English Muffin
Triple Cream Cheese
For the Pickles
1 English or pickling cucumber
Rice wine vinegar
1 Fresno chile
Salt
1). Make pickles. Slice cucumber and Fresno chile as thinly as possible on a mandolin. Layer cucumber in a very small bowl, add small pinch salt and as much sliced chile as you like. Add additional layer(s) of cucumber and chile and salt. Add enough vinegar to mostly submerge. If your bowl is small enough, you should only need ½ cup or so of vinegar. When your burger is ready, the pickles will be too.
2). In a large bowl, add beef, yolks, tarragon and salt to taste (don’t be bashful with the salt, Food Night uses about 2 teaspoons for a pound of beef, perhaps more). Saute the shallot in the butter over medium heat until translucent, and add the butter/shallot mixture to the beef. Mix everything together with your hands. Let stand at room temp for 20 minutes.
3). Heat a well seasoned 12’’ cast iron pan over medium-low to medium heat (maybe 4 out of 10). Form beef into thick ¼ lb patties.
4). When hot, but not smoking, place burgers into the pan. Do not overcrowd the pan. If you made the burgers thick enough, you will have enough room to cook all 4 at once. Cook for approx 3 minutes per side, a tad longer if you must. The goal is to achieve a nice crust on the exterior and a medium (hot pink) center.
5). Remove burgers to a plate when done, turn the heat down to low-ish on the pan , and put the cut* side down of two English muffins in the pan. Press down, cooking until caramelized. Yes, there are burger remnants in the pan, and yes you want them on your English Muffin. You’ll be able to toast two English Muffins at a time, add more butter to the pan for the second batch.
*It’s worth using a sharp knife to make a clean cut in the English Muffin, rather than separating it with a fork or your fingers as you may do for breakfast. The cleaner cut caramelizes better in the pan.
6). Place burger on English muffin, top with a hefty slice of cheese, and cover with the hot English muffin top. Wait 1 minute to allow cheese to begin to melt (yes, WAIT. 1 minute. You can do it). Devour with the pickles. And beware of your neighbors at the table.........
Thursday, November 24, 2011
Happy Thanksgiving
Happy Thanksgiving!
P.S. – If you are looking for how to prep your turkey in future years, look no further than this roast/braise combo from Michael Ruhlman. That's how Food Night rolled this year, to absolutely perfect results...
Tuesday, November 15, 2011
Proper Pan Roasted Chicken
Before we get to the technique involved here, let’s touch on three things you can do before the fowl hits the frying pan that will facilitate success:
1. The pan. Use properly seasoned cast iron. Or, use a nice stainless steel pan (such as All Clad). A 12’’ pan will allow you to cook 1 or 2 pieces of chicken. Never exceed 2 pieces in one pan.
2. The pan must be hot. Not warm, not nuclear… but hot.
3. The chicken. If at all possible, buy your chicken at Heartland. Why? Because the chicken there is fresh, properly butchered, and air dried in the cooler so the skin is DRY. Which is a very good thing, since it’s impossible to crisp up wet, soggy skin. If you can’t get to Heartland, buy an ethically raised, hormone free, skin on chicken breast, leave it UNCOVERED on a plate in your refrigerator for two or three days to dry out the skin. And yes, this step is worth it if you don't get your poultry at Heartland.
Pan Seared Airline Chicken Breast
1 (or 2) Kadejan Farms Airline* Chicken Breast(s)
Oil (not olive, ideally peanut or grapeseed, but canola would suffice)
Butter
Salt (kosher for seasoning, Maldon for garnish)
*An “Airline” chicken breast leaves the first joint of the wing (i.e. the “drummie”) attached to the breast. Also, the skin is left on, which is key, since it’s hard to get crispy skin without, you know… the skin. And you absolutely do want crisp skin on your chicken.
1. Take the chicken out of the refrigerator 30 minutes prior to cooking, pat any moisture off the chicken with paper towels, and place skin side down on a plate. Sprinkle kosher salt over the flesh side. Preheat the oven to 375.
2. Put your dry pan on the stove over medium to med-high heat. When it’s hot (not warm, not nuclear), film your pan with oil, a generous teaspoon per piece of chicken. It should instantly ripple, perhaps smoke slightly. Add the chicken skin side down, and note the loud sizzle when it hits the pan.
3. Saute for 2 to 3 minutes on the stove, add butter (approximately 1 tablespoon per piece of chicken) to the pan, gently lift* one side of the chicken so that the melted butter has a chance to get between the skin and the pan.
*If your chicken is stuck to the pan… forget lifting it, and just put the pan with the butter in the oven. Maybe try to lift it again after it’s been in the oven 5 or 10 minutes.
4. Put the pan in the oven for 15-20 minutes, depending on size of chicken.
5. Chicken is done at an internal temperature of 165F. If chicken isn’t done after 15-20 minutes, turn chicken skin side up and return to the oven until done. Note chicken will continue to cook approximately another 5 degrees after it’s removed from the oven. When done, allow chicken to rest on a plate for 4ish minutes before slicing.
6). Garnish with Maldon. Devour* while standing over the sliced meat in the kitchen, or in a civilized manner at the table with your favorite accompaniment(s) (Dijon mustard? Sriracha? Mixed green salad? Caramelized brussles sprouts and a sunny side up duck egg?........).
*Make sure you freeze the wing bone in a freezer safe bag, to reserve for making chicken stock. You’ll be making this chicken often enough that you’ll have a bag full of wings in no time.
Sunday, October 30, 2011
Grilled Sweet Corn Ice Cream
*False. Though it was timely a short while ago.
Do you have in ice cream maker? Well, if you have one of these…
… then, yes, you do. And if you do have a Kitchen Aid, and you are reading this, then you should own this and this. The pasta attachment and the ice cream attachment are two things Food Night really wouldn’t be the same without. Well, those two things and plenty of this…
Anyway, Food Night VERY passionately endorses making your own ice cream. In all seriousness, it is A). Easy, and B). Vastly superior to anything you can buy in a grocery store, and you can buy some pretty deece stuff these days.
So if you’ll allow Food Night to spend your money for you; buy the ice cream attachment, and then buy this book. It’s all you need. Well, that and this recipe for…
Grilled Sweet Corn Ice Cream
5 egg yolks
1c whole milk
1c cream
6T sugar
2 ears corn
Pinch salt
1T bourbon
Pinch cinnamon (optional, but recommended)
Pinch paprika (smoked, preferably… optional, but recommended)
1). Grill corn on med-high direct heat, while still in the husks, until husks are blackened on all sides (seriously, blacken the hell out of them). Remove husks, some kernels should have slight to moderate char. Cut kernels off cobs, cut cobs in half and reserve.
2). Combine milk, cream, sugar, corn, cobs, and salt in a sauce pan. Bring to a boil. Add cinnamon and paprika if using. Remove cobs from the pan, puree corn/cream mixture with an immersion blender, retrun cobs to pan and steep for an hour.
3). After an hour, remove cobs, squeezing liquid from the cobs back into the pan. Set up a medium bowl in an ice bath. Wisk yolks together in a separate medium bowl. Rewarm corn/cream mixture, and temper the yolks by pouring the warm cream mixture into the yolks very slowly while constantly stirring.
4). Return mixture to the pan, and the stove, and cook slowly on med-lowish heat, stirring constantly and scraping the bottom of the pan, until the mixture reaches at least 170 degrees, or the custard coats the back of a spoon.
5). Pour mixture through a (medium mesh) strainer into the bowl in the ice bath, add bourbon, and stir to cool for a moment.
6). Strain. Strain. Strain. And once you’ve finished straining the mixture, strain it again. (Recommend; start with the medium mesh strainer, as the mixture isn’t pureed terribly finely by the immersion blender. Then do at least 1 preferably 2 passes through a fine mesh strainer. Straining is KEY to a smooth result).
7). Cover the mixture with plastic wrap pressed directly on the surface of the custard. Chill overnight. Then freeze in your ice cream maker according to manufacturer’s instructions.
Sunday, September 18, 2011
Have a Passion
My favorite apron, a gift from Niver + Grandma Eastman's napkins + Calera corks + a broken glass = Food Night.
At the table last night, we discussed when a wine becomes “more” than just a beverage. It’s a hard concept to convey, and is certainly a subjective topic. One person’s perfection is another’s blahsville. Last night we had a wine that approached the wine stratosphere. 2003 Solaia…
Can there be a “best” Food Night? Each one is so unique and gratifying and memorable. That’s why we started documenting these things on the WWW’s, so we could remember them all. The flawless summer night we sat outside and enjoyed the 1996 Calera Reed. The night we had the 1999 Fay, or the 2001 Monte Bello, or the 2000 Dunn. All the truly fabulous guests we’ve shared the table with. Each experience lends something to the collective. And the collective has become something I honestly can’t imagine being without.
The lineup of wines last night was bordering on ridiculous. 2007 Clos Des Papes. Antinori….. not once but twice. 1997 Tignanello and 2003 Solaia. Calera…. not once but twice. Both Mt. Harlan Chardonnays, 2009 and 2004, and a cool discussion about “I thought white wines didn’t age”. Well, clearly certain ones do.
We are wine-obsessed. We care a little too much, and get a little too excited about wine. But it’s brilliant to have a passion. If you’ve got a passion, share it. Cultivate it. Grow it. Some get to go to work and immerse themselves in their passion. I know lots of those people, and I admire, respect and somewhat envy them. Others work to have the means to do what they love. I’m starting to get comfortable living on that side of the coin. The important thing is to have a passion, or four, or twelve. Care so much about something that it makes you want to grab random strangers and inundate them with said passion. Whether that passion is music, legos, the color blue or wine. Have a passion. And be passionate.
The Food Night table was filled with passionate people last night. And that was a beautiful thing.
Food Night hopes you are indulging in your passions as often as possible.
Tuesday, September 6, 2011
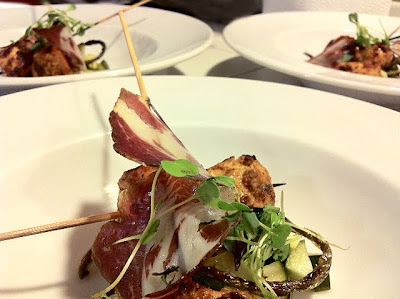
Chicken Skewers
*And by humble, Food Night of course means BLAH.
Chicken; On a Stick
Serves 4 as a first course/small plate
For the spice paste
1 clove Garlic, shaved thin
1/2t caraway seed
2t coriander seed
1t alleppo chile flakes (find at Penzey’s)
Zest from 1 lime
White peppercorns to taste
Salt to taste
Combine all ingredients in a large mortar and pestle and pulverize into a paste. Stir in a couple tablespoons of toasted sesame oil.
For the Chicken
1 whole boneless skinless breast*, cut into large, equally sized chunks
Skewers, soaked in water for an hour or more
*And by “whole”, Food Night means all of the breast meat that would be found on a chicken.
Slather the chicken chunks in the paste, let stand for at least an hour, preferably 4hrs. Overnight would actually be ideal.
For the pickles
Juice of ½ the lime
Pickling cukes, halved lengthwise, seeded, cut into pea size dice
Serrano chile, shaved thin on a mandolin (optional)
White wine vinegar
Salt
Combine all ingredients in a small container, let stand at least 30 minutes.
For the Garnish
Fresh peach, chopped
Mangalitsa coppa, from Heartland*, shaved thin
Blanched, shocked, grilled garlic scapes, from Heartland*
Microgreens (Heartland*)
*Obviously.
To assemble
Remove the chicken in the paste from the refrigerator, skewer (2 pieces per skewer), leaving space between each piece of meat. Then, ALLOW CHICKEN TO REST ON THE COUNTER 20 minutes prior to grilling.*
*As you can see by the capital letters, Food Night is trying to emphasize that this is an important step. Food from fridge to fire results in faulty food lacking in proper caramelization and doneness. And honestly, it’s about the EASIEST thing you can do. Actually you don’t even have to “do” anything… just let the skewered bird sit there… and walk away.
Food Night grills it’s skewers on a gas Weber grill over direct high heat, with the grill uncovered. Turning as appropriate, this usually takes roughly 5 minutes total. Grill the garlic scapes (if using) when the chicken comes off in the same way – high heat, uncovered.
Allow your skewers to rest post-grilling for a few minutes, then plate on top of some of the pickles, peach dice, garlic scapes, and top with the coppa and a drizzle of olive oil.
Sunday, August 14, 2011
Cucumber Gazpacho
I recently had some cucumber gazpacho at Heartland, and of course subsequently had discussions with the gents there about how exactly they made it. The following is how Food Night made* it, which much thanks to Dan, Chad and Aaron at Heartland for their knowledge (** fist bump **).
*What follows is the recipe exactly how Food Night made it. Included “optional” ingredients are highly encouraged, but shouldn’t prevent you from buzzing up a batch of this stuff if you don’t want/have/need/like any of these ingredients.
Cucumber Gazpacho
24ish ounces cucumber (used; pickling cucumber), roughly chopped
1T creme fraiche
2T fresh dill
2T fresh parsley (blanched for 5-10 seconds, shocked in an ice bath)
1T fresh cilantro (blanched, shocked)
Juice from 1 lemon
Splash white wine vinegar
4 ice cubes
salt
Optional (but highly encouraged) Ingredients
6 raw almonds
1/2t smoked paprika
1/2t ground coriander seed
Pinch ground caraway seed
4T dry white wine
Garnish (again, obviously optional but highly encouraged)
Tomato
Maldon salt
Fresh dill and chive
Diced poblano chile
Crème fraiche thinned slightly with a spash of water
1). Combine all ingredients in a blender. (I usually salt each cucumber as I put it in the blender to help track approximately how much salt to add. It's easier to salt "a" cucumber, rather than a pile of them, right?)
2). Puree to desired consistency.
3). Check for seasoning, adding salt/acid as necessary.
4). Serve, with garnish.
*With a glass of Calera Rose.......................... but you knew that already.
Friday, July 22, 2011
Chicken Wing Confit
And in this case, Chicken Wing Confit. There is no question that the wing is not exactly the most glamorous part of the bird. When you think “chicken wing”, you likely think of deep fried, smokin’ hot, somewhat forgettable bits of bird that are typically drowning in buffalo or other cloyingly sweet and/or sour sauce. Not to put words in your mouth, of course. But if you confit the wing... look what fun that can be...
Food Night assures you, the confit process is INSANELY easy, and produces results that are preposterously good and disproportionate to the level of effort required. The simple three step "how to confit poultry" process is as follows;
1). Cure. Season your poultry with a healthy does of salt. More than you normally would use if you were going to simply grill or sautee the item. Seasonings? Optional, but encouraged. Add them now. Garlic, fresh herbs, fennel, clove, peppercorn, etc. Cover, and let the product hang out on the cure in the refrigerator for 24 hrs. Or more, preferably, like say 72 hrs.
*Those are duck legs from Heartland on the cure.
2). Rinse, pat dry. Place in an oven going pot. Cover completely with fat (traditionalists would use fat from whatever protein you are using…chicken fat, duck fat... but I’ve been using olive oil to great success thanks to Michael Ruhlman). Bring to a bubble on the stove, then place in a 180 degree oven for 12 hours.
*Whole Foods currently has very cost effective large format containers of olive oil.
3). Remove the pot from oven, skim any gunk off the top of the pot, and let cool. DONE. You now have confit’d… whatever. Duck legs. Chicken legs. Chicken wings. Duck wings. Go crazy. Store your “whatevers” COMPLETELY submerged in the fat in the refrigerator*, where they will keep pretty much indefinitely. Please make sure your whatevers are totally submerged in fat to preserve them safely and properly.
*Here is where a Le Creuset vessel comes in handy as it will go from refrigerator, to oven, to cool on the counter, and back to the refrigerator. Very convenient.
From here, you can simply remove your preserved legs/thighs/whatever from the fat, and reheat them on a sheet pan in the oven, perhaps broiling them a little at the end to crisp up the skin.
For the GrillTastic Food Night, I had some leftover chicken wing confit that I’d made a few weeks earlier. And I found some of the season’s first killer heirloom tomatoes at the co-op. So… this happened…
Honey Bourbon Glazed Chicken Wing Confit with Heirloom Tomato Salad
1). Make chicken wing confit, using the technique above. This can/should be done WELL in advance. Food Night added a whole pile of fresh herbs (tarragon, thyme, oregano) and lots of shaved garlic, in addition to allepo chile flakes, fennel, coriander seed and cumin to the cure. And the wings were actually on the cure for 72 hours.
2). Get started on Heirloom Tomato salad (recipe follows). You’ll want the tomatoes seasoned and sitting in a colander as you warm the wings in the oven.
3). Heat the oven to 375 degrees. Remove wings from fat (fat should be at room temp so it isn’t solidified), arrange on baking sheet, and place in oven to warm.
4). Whisk together the Honey Bourbon Glaze (recipe follows) while wings are warming.
5). Baste wings with glaze a time or two while they are warming.
6). Remove wings from oven. Turn on broiler. Reduce glaze in a saucepan to thicken. Baste again with thickened glaze and broil to char SLIGHTLY. Remove from oven, and baste again.
7). Lovingly arrange wings on a plate, scatter with tomatoes, garnish with more shaved radish, chives, and a few flecks of Maldon on the wings (not on the tomatoes… those are plenty seasoned).
8). Devour. But don’t eat the bones…
Heirloom Tomato Salad
Heirloom Tomatoes, of various colors
Breakfast Radish, shaved thin on a mandoline
Olive oil
Kosher Salt
Finely diced fresh green or red chile (optional)
Finely diced chives
1). Dice the tomatoes into smallish (pea sized or larger) chunks. Place in a colander, season with salt, and let stand for at least 20 minutes. The tomatoes will throw some moisture, concentrating their flavor.
2). Toss the tomatoes with the remaining ingredients and reserve for use with the wings.
Honey Bourbon Glaze
2T honey (or brown sugar if you find yourself honeyless)
Juice of half a lime
Zest of half a lime
2t sriracha hot sauce
1T whole grain mustard
1T Dijon mustard
1T soy sauce
2T bourbon
2t smoked paprika
Whisk all ingredients together. The end.
Wednesday, July 20, 2011
Food Night goes Grilling
*Not including the braised pork shoulder which gets seared on the grill prior to braising.
For grilling inspiration, Food Night looked to the best restaurant in St. Paul… The Strip Club.
(photo by Tom Wallace, for vita.mn)
When not Food Nighting, you can sometimes find me enjoying proper food and drink at The too-fabulous-for-words Strip Club Meat and Fish.* Chef JD does a killer little ditty there called “meat on a stick” that changes daily and is typically served with fun little accoutrements. Who doesn’t love grilled bites with accoutrements?! Inspired (and after standing over the grill, excessively perspired), Food Night fired up the grill on a recent Saturday that was so sweltering, even the wine was sweating...
*Suggestion – if you would like to experience a perfect Saturday morning… begin at the St. Paul Farmers Market, cruise across the Street to the Heartland Market to pick up Saturday dinner proteins and whatever else, then scoot up the hill to TSC for brunch while sitting at the bar. Bang. Perfection. See you there.
Hell, we even grilled the SALAD at Food Night!
So let’s do this; let’s see if Food Night can pound out a post a day for the next four days – one for each course at the recently completed Food Night on a Stick. Yes? Yes.
Grilled Summer Salad
Like lots of things at Food Night, what follows is ripe for your brilliant and learned improvisations. Whatever you’ve got and wanna grill and make a salad out of… be my guest. But I must say… the following was super summery and delish.
- Garlic Scapes (pictured above, get ‘em at the Heartland Market, Farmers Market, etc); blanched for 30 seconds, shocked in an ice bath, patted dry,
- English Peas (shelled, blanched, shocked)
- Cherry Tomatoes
- Brussels Sprouts, halved through the core, excess leaves removed and reserved.
- Herbs (purple basil, arugula, tarragon, lemon thyme, whatever you want)
- Cucumber broth (recipe follows)
- Shallot (finely diced)
- Lemon juice
- Maldon sea salt
1). Fire up the grill, and get it HOT. (Food Night uses a gas Weber that gets blazing hot). Season scapes, tomatoes, Brussels sprouts separately with salt, pepper, and olive oil.
2). Skewer the tomatoes (soak the skewers for an hour in water if they are wood), and grill the tomatoes long enough to just blister the skins a tad and soften partially. Toss Brussels sprouts directly on the grill, they will pop and fuss a little bit, turn once to mark and soften, and remove. Grill garlic scapes to desired level of charredness.
3). Sautee reserved Brussels sprout leaves in a modest amount of olive oil for a couple minutes over med-high heat, finish with a little finely diced shallot and a splash of lemon juice.
4). Combine tomatoes, scapes, sprouts, peas, and herbs in a large bowl. Drizzle with cucumber broth, olive oil, lemon juice. GENTLY toss to combine, and sprinkle with a dash of Maldon sea salt.
5). Arrange lovingly on a plate, and finish with your favorite cured pork product from Heartland Market… Food Night used the utterly insane Wild Boar Prosciutto. Get it while you can (it’s very limited) – that stuff is funky delicious. Garnish with sautéed sprout leaves, micro arugula, and a drizzle of the cuke broth. Or, don’t.
Cucumber Broth
- 1 English cucumber, washed, rough chopped
- Handful bright green herb(s) (parsley or tarragon work great, blanch and shock for brighter green color)
- Salt (enough to season the cuke)
- Handful of Ice
- Water (maybe a ½ a cup… enough to get the mixture moving)
- Lime juice (roughly juice of ½ a lime)
Combine all ingredients in a blender. Puree. Extensively. Strain if you must, but not required – really depends on how finely your blender can puree the food stuffs. I like it unstrained for use in this salad as it retains some body/structure and seems more like a salad dressing substance. If strained, I’d probably emulsify it with oil for the salad dressing (as you would vinegar for vinaigrette).
Use as directed above. And with seafood. And in your favorite Hendricks Gin cocktail.*
*YEAH. Definitely use with Hendricks.
Thursday, June 9, 2011
A Very Spring-tastic Food Night
So please, witness what happens when Spring and Food Night collide....
Spring Orgasm Soup is what we called this. And full disclosure… Food Night got that terminology from Dan Step. This Spring, when all the ramps and asparagus and greens started appearing at Heartland, Dan sent me a text to the effect of “It looks like Spring had an orgasm in here!”. That slayed me, so I retained and reused that here. Yes, Food Night is so eco-friendly, we even reuse clever wordplay. So what... we've got here... is...... asparagus (blanched and shocked), English peas (ditto), ramp greens (ditto), parsley (ditto), all vitamix'd with a little half and half, and lemon. Silky springy goodness. That vitamix is a life altering apparatus, don't let anyone tell you otherwise. (Thanks again Mpls Auxiliary Chapter!!) 
Pasta. Pasta is never a bad choice. Unlike milk, which yes… is sometimes a bad choice. But this time Food Night tossed a bit of white wine into the dough, to great success. The pesto was a little disappointing – I mean it worked, but I was efforting this (HIGHLY encourage you to check out that link… really). If anyone knows how to get pesto to look like that… like it’s had cream added to it… please let me know. My right arm is now twice as strong as my left from all the mortar-and-pestling, but my pesto did NOT look like that. Sure it tasted fine, delivering fresh basily and pine nutty goodness, but let’s just move on.
Chicken confit. Pea puree. Seared oyster mushroom. This....... was the REAL DEAL. One of the best things ever at Food Night. Just ask Alex. D-Step taught* Food Night the mushroom technique – mushrooms, tossed in oil, roasted in a 375ish oven until they have some color (10ish minutes? Maybe more… free country remember), then finished in a HOT pan with butter, hit with some fiiiiiiiiinely minced shallot and garlic, finished with a healthy pinch of fresh herbs and a tablespoon or two of lemon juice. So literally the time from when the mushrooms enter the pan until they are done (if your pan is HOT enough…) is like a minute. Bang. That just happened.
*And apparently Adam Vickerman taught Step that technique... you want to cook (good) mushrooms like this is all I can say.
Hash. Smoked lamb shank (via Heartland), duck confit (via Food Night), fingerling potato, oyster mushroom, fresh herbs, brussles sprouts. Pea puree. Couple bacon lardons. And a perfect sunny side up egg. Looks good enough to eat, right? We thought so….
*We really aren't doing the pea puree justice here. I think Food Night first-timer Scott said "I could eat this stuff like yogurt". Yes - what he said.
To drink? This ......happened........
It's been a debate here at Food Night Home Offices... how much to really say about wines? Because after all, how interesting is it to hear about a wine that someone else drank? It can be informative, it can be interest peaking, it perhaps can even be mildly entertaining. But Food Night thinks... maybe less is more when it comes to the wine frothing at the mouth? So let's just say two things about this incredible wine...
1). The Dunn 2000 Howell Mountain (in Food Night's opinion) was vastly superior to the 2005 Clos Des Papes Chateauneuf du Pape, which we also (thoroughly) enjoyed that evening. And the '05 Clos Des Papes was not exactly Yellow Tail, seeing as how it earned Wine Spectator's "Wine of the Year" distinction in 2007. So... there's that.
2). The Dunn drank like high end bordeaux, and was consistent with the two prior Dunns we've had (the 1992 while on Food Night Field Trip, and the 2001). It was decanted for 10 hours prior to consumption, and drank perfectly. It probably elicited between 10 and 20 "Holy S&%t is this stuff amazing!!!" type comments during it's consumption from various consumers. Rich, full bodied, balanced, with a minty/eucalyptus tinge that we found very appealing, and a finish that I think I'm still tasting a week later.
Let's leave it at this - if Food Night was stranded on a deserted island, and could have a lifetime supply of one domestic CABERNET producer's wines (thus eliminating Calera from consideration....) dropped from a C-130 onto said island (a likely scenario, obviously)... Food Night would request Dunn Howell Mountain Cabernet.
Yes... it's that good. Easily.