Sunday, May 1, 2011

Goat Cheese Ravioli

Clearly you have been perfecting your duck egg pasta dough technique. So now, it is time to turn said sheet of silky succulent pasta into a goat cheese carrying apparatus. Also known as “proper food”.*


*Ever watch Jaime Oliver’s “Jaime at Home” TV show? I don’t think he is making new episodes anymore, but I believe it is being rerun on Cooking Channel now. It is completely reflective of why I’m such a massive fan of his, and probably where my Jamie Olive man-crush was born. If I could cook and/or eat and/or have a beer with and/or share an apartment with one “celebrity” chef, it would be Jaime, hands down. Anyway, I heard him say as he was finishing making something that “this is proper cooking”, and now “proper” is my favorite cooking adjective. By far. Feel free to incorporate it into your everyday vocab as I have done. I think you’ll enjoy it.

Goat Cheese Ravioli

1 duck egg pasta recipe
Egg wash (1 egg beaten with a tsp or two of water)
Soft goat cheese (such as Donnay)

1). Lay sheet of pasta on a floured work surface. And flour a sheet pan or other “landing zone” for your finished raviolis

2). Dot the pasta sheet with roughly a tsp of goat cheese. Place goat cheese on top half of the sheet, as shown, as you’ll be folding the bottom half over it.


3). Brush egg wash between the cheese, and along the top of the sheet. Egg wash will help make a good seal, serving as pasta cement, if you will. Mmmmmm, pasta cement.

4). Fold bottom half over top half, and seal. Work from the folded side of the sheet, forcing any air out the top. You are essentially molding the soft pliable pasta around the dollup of tart goat cheesy goodness.


5). Divide into individual raviolis using a knife, ring mold, or preferably this $5 pasta wheel (best $5 gift I ever got). Transfer to afore mentioned floured landing zone.

Here is where you also have a chance to gently squeeze out any air pockets, and make sure all 3 sides are sealed. The most important thing here is a good seal. If there is a smidge of air trapped in there, don’t stress.

6). Plop into heavily salted water that is GENTLY boiling until done. Usually a minute or two. Or, freeze, and they go from freezer directly to the water.

I tossed these with a little diced carrot, sunchoke, and butter.


Proper cooking.

Friday, March 11, 2011

Game Changers

Diner commentary at the Food Night table (pictured) has always led me to believe that the seared scallops at Food Nights past have been up to par.

And looking back, I honestly do think they were pretty good. But Food Night isn’t satisfied with “pretty good”. So in a quest to turn that culinary par into a birdie (or better), Food Night tried something new with the seared scallops this time. The results? I’ll let this picture say a thousand words………


I mean………… THAT is how you sear a scallop! End. Of. Discussion.

Food Night actually has a bit of a foodgasm every time it looks at that picture. I may even go to Sears and get wallet sized copies of that picture made and pass them out to strangers on the street, like some people do with pictures of their grandkids. And you think I’m kidding…

I guess what I’m saying is, this scallop searing methodology “tweak” was a bit of a GAME CHANGER. And actually it was only one of TWO game changers that transpired at “Food Night – Quack Edition”.

Game Changer #1; The shockingly simple scallop searing scenario.

Game Changer #2; DUCK CONFIT. Please witness….


Food Night is a bit ashamed it took this long to confit some duck. You know how sometimes when you are reading the letters to the editor of your favorite magazine, and someone writes in to say something like:

“Dear Sports Illustrated, it was actually Sven Blimpenberg and not Hugo Richalds that scored the game winning goal for Canada against Greenland in the Frozen Tundra Cup in 1962”.

And after printing the correction letter, the editor usually follows it with a “SI regrets the error”. Well, Food Night regrets the error, and will be confiting the bejezuz out of many fowl legs in the weeks and months to come.

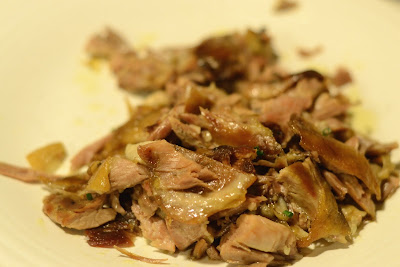
And you should too! Therefore, Food Night is gonna show you how. That is…. if succulent, moist, rich, tender, literally falling off the bone goodness like this…


… would be of interest to you. And if it isn’t, well… I don’t know how to help you. You’re on your own.

So, two game changers, and we haven’t even BEGUN to discuss the wines of the night! Some were new and unique, some were familiar favorites, and then there was this guy… the winner of Best-In-Show for the evening…


*This seems like a good time to mention that, obviously, someone that knows what they are doing with a picture taking device was in attendance at Food Night. That would be Dan Stepaniak, the very same Dan from Heartland that provided the incredible duck product for “Food Night – Quack Edition”. THANK YOU Dan for your excellent contributions, culinary and otherwise, to Food Night!

To sum up; in the coming posts, we are going to revolutionize your scallop searing skills. We are going to build on your duck egg pasta making skills (that you have no doubt been practicing) via goat cheese raviolis AAAAAAAND via course #4 at “Food Night – Quack Edition”, dubbed Duck Three Ways...


*Come on, I can’t show you ALL the photos yet!!! But I can tell you, Duck Three Ways was located in the plates above, about 10 seconds after that picture was taken. And, I dare say, it was the highlight of the evening’s food stuffs.

So have a look at the menu for “Food Night – Quack Edition”, and your server will be along shortly to take your order…

Heartland Duck Charcuterie
procuitto, sausage, duck fat fried chipotle ciabatta

Soup
tomato, roasted red pepper, guajillo chile, foie gras buttered crouton

Scallop
braised fennel, chipotle salsa, orange zest, hedgehog mushroom

Duck Three Ways
duck egg pasta, duck confit, foie gras butter

Sweets
Goat Cheese Ice Cream, Mocha sherbet


France
Louis Latour, Pommard-Epenots, Premier Cru
2005

Chateau Pichon Longueville, Comtesse de Lalande, Pauillac
2002

Leroy, Bourgogne Blanc
1998

Domaine des Remizieres, Hermitage Blanc, Cuvee Emilie
1999

Italy
Le Are, Amarone della Valpolicella
2000

Casanova di Neri, Pietradonice
2000

Parusso, Barolo, Bussia Vigna Munie
1996

Antinori, Guado Al Tasso
2001

Australia
The Standish Wine Company, "The Relic", Shiraz, Viogner
2006

Clarendon Hills, Old Vines Grenache, Kangarilla Vineyard
2002

Other
Sutter Home, White Zinfandel
1993?!?!?

Friday, March 4, 2011

Food Night - Quack Edition

Before we get to the deets on how to turn the duck egg pasta you've no doubt perfected into a succulent goat cheese transportation device, I thought you might be interested that...

FOOD NIGHT is happening tomorrow, March 5th!!! Yes, I know, it's a big deal. Food Night shunned it's day job today to prep and shop and generally freak out about the menu, which... if things go according to plan... is really going to be special and rather thematic. Thematic in two ways...

MARCH 5th FOOD NIGHT THEME #1;


Yep, Food Night is throwing down a mass quantities of DUCK. Now, Food Night knows what you are thinking; "Wow, cute duck! But, isn’t this a new protein for you, Food Night? Have you ever cooked duck before?". And the answer is "Yes, that is a cute duck and his name is Fritz, and he was unharmed by Food Night. And no, of course I've never cooked duck before." But I was inspired and encouraged by, you guessed it, Ruhlman. Ruhlman basically said I was insane if I wasn't confit'ing duck. And since I'd basically jump off a bridge if Ruhlman told me to, I thought I better get on this duck confit thing.

But there was a problem... where do I buy duck? Grocery store? Um, no, not gonna buy frozen Donald legs from the grocery store. Nope. And no, not gonna mail order some Quacker legs from D'Artagnan. Doesn’t seem right, poultry via mail. So what does one do when one lives in Mpls/St. Paul and one wants duck stuffs? One goes to theme #2...

MARCH 5th FOOD NIGHT THEME #2;


Heartland Farm Direct Market! This place is transforming the way I shop. The proteins they pedal are so pristine, perfectly portioned, and properly procured, I cannot walk in there and leave without grabbing something to throw in the cast iron skillet. And it just so happens that they offer duck stock, too. And duck eggs. And duck prosciutto. And duck fat. But Heartland is more than a duck emporium, sometimes you can get things like wild boar chops, or the most succulent and tasty beef tenderloin you've ever had… (you remember how to cook beef tenderloin, right? Thought so.)…..


…and a million other things like house made sausages and other cured meat treats that reside in their glass case of food-emotion!!!....


Food Night has shopped the living hell out of Heartland recently, buying this, trying that, eating this, cooking that. And when you frequent a place enough, sometimes you strike up a vibe with the people on the payroll. So when a spot at the Food Night table recently opened up, I offered the vacancy to Dan at Heartland. And I’m happy to announce that Dan will be joining the festivities on Saturday! Dan has contributed a pile of knowledge and product to this Food Night table, and we are fired up to have him dine with us.

This Food Night also has an "A" list of Haskell's folks coming, so the wines are guaranteed to be completely ridiculous. And in case anyone brings a small child, Food Night's resident pediatrician Dr. Tom will be on-site.

PLUS - courtesy of said pediatrician and the rest of the gang at the Minneapolis Auxiliary Chapter of Food Night, this marks the first time Food Night has had THIS little beauty at its disposal....


As you can see, things are shaping up quite nicely this Food Night's Eve. We are churning out a menu full of new flavors and ingredients… stop back soon to see how it shakes out.

Thursday, February 10, 2011

How to make Fresh Pasta

Fresh pasta is a staple at Food Night. Why? It’s easy. It’s economical. It’s delicious. It’s wine friendly. It’s incredibly versatile. It’s the star of the show, or it’s a perfect background vocalist. It cooks up quickly. Need I go on?

And for cripes sake, you can make fresh pasta with two ingredients… eggs and flour. TWO ingredients are all you technically need, so yes, you can do this. And you SHOULD do this, which is kind of the whole point of whole post. Not only is the end product incredibly satisfying and delicious, but making fresh pasta quenches your inner child’s fingerpainting and play-doh mashing desires. It’s fun to get your hands into your food – assuming you have clean hands, of course.


So here is how Food Night has been making fresh pasta lately. I say “lately” because until recently, Food Night would use chicken eggs to make fresh pasta dough. After all, nothing wrong with a nice organic free range chicken egg, right? However, on a recent trip to the incredibly inspiring and wonderful Heartland Farm Direct Market* in downtown St. Paul, Peder recommended these duck eggs to me...


That night, I put them to use in a fresh pasta dough. How did it go? Well, I haven’t used a chicken egg to make pasta since.

*Post coming on the Heartland Market. If you live in the Twin Cities, and you like to cook (and if you are reading this I have to believe at least ONE of those things is true…… ) you simply must go to Heartland’s Market, pictured below. More later.


What follows is what I’m calling Food Night’s recipique* for…

*Recipique [Res-eh-PEAK] – a combination of the words “recipe” and “technique”, meaning that the recipe amounts should not be taken TOO literally, and that there is probably as much importance in the “HOW” vs the “how much” part of the recipe. If we wanted to be exacting here, we’d weigh everything and give you an exact recipe featuring X grams of egg yolks and Y grams of flour, etc. But, alas, that has not happened here. Thanks for understanding. Plus, this recipique will make you think and read and react to your dough. And it’s how I imagine little Italian grandmothers made pasta dough. So channel your inner child and your inner little Italian grandmother and make some pasta from scratch already.

Duck Egg Pasta Dough
1 ¼ cups all purpose flour
3 duck egg yolks, procured from Heartland’s Market
1 whole duck egg
3 finger pinch salt
Small drizzle olive oil

NOTE; If you must, use chicken eggs. If the yolks are normal sized chicken egg yolks, toss in an extra one. The duck egg yolks are quite substantial. I’ve never seen a chicken egg yolk as big as one of these duck egg yolks. Food Night wants you to make fresh pasta, because you CAN. So don’t let a lack of duck eggs stand between you and your fresh pasta.

1). Mound flour. Make a well in the center of the mound.


2). Place remaining ingredients in the well.


3). Using two fingers, bust up yolks, and stir with said fingers, incorporating flour into the mixture gradually. If you are simultaneously taking pictures of this process, it would help to either grow a third arm, or have someone else take the pictures. Either is fine.


Continue incorporating...


4). THIS STEP IS BASICALLY THE KEY TO THE ENTIRE PROCESS. Hence, the capital letters. They signify “importance”.

After you combine most of the flour into the eggs, the mixture should be getting thicker, and resemble something like this...


At this point, use your hands and a pasta scraper to collapse the well, sort of cutting the flour into the wet mass that is forming …


… and form a ball with the dough, leaving say a scant ¼ cup of extra flour on the board to add to the dough if needed. Understand that as you form this ball initially, the dough will be sticky, so it helps to have a pasta scraper to remove wet dough from your fingers and the board to add to the ball.


IMPORTANT: Don’t force more flour into the eggs than the eggs want. If you are making ravioli, I like the dough to be a little wetter, more flexible. If you are just making noodles, the dough can be a little drier. But, it’s ALWAYS ALWAYS easier to add flour to a wet dough than it is to add moisture to a dry dough.

If your dough is quite wet, add some of the leftover flour here. You are looking for a ball of dough that is workable (not so dry that it resists kneading). Once you gather it all up it should look something vaguely like this…


5). Flatten out the ball of dough with the heels of your hands, then form it back into a ball, and repeat. Again. And again. And again. And..... again. This process usually takes several minutes. In the summer, sweat forms on my brow. This is not cooking for sissies. But you aren’t a sissy so, no worries.

Maybe you need more flour here too, could happen. Has happened. Read... and react. As you knead, the dough should begin to take on a uniformly smooth texture and appearance. What you are after is a smooth dough…


… that passes the “spring back” test. As in, when formed into a ball that looks like the above, if you drag your finger across the dough, does it “spring back” into shape. If it doesn’t, if the dough just sits there like a stuck pig when you poke it, knead some more, understanding that you basically can’t overwork the dough. If the dough is relatively lively, elastic, and bounces back fairly well, you are done. Wrap the dough tightly in several layers of plastic wrap, let it stand on the counter 30 minutes (or in the fridge for up to a day), then move on to the final step.

6). Pass the dough through pasta machine.


I use a pasta scraper to segment off about 1/3 of this ball of dough. Trying to pass much more than that through the machine tends to get unwieldy as the pasta sheet gets thinner and thinner and longer and longer. Flatten out that chunk of dough you separated with the palm of your hand, then pass it through the pasta machine according to your manufacturer’s instructions…


I finish on my machine’s #6 setting of the thickness (or would it be thinness…). Setting #8 is the thinnest setting on my machine, if that helps at all. #6 seems about right for most pasta applications.

If you lack a pasta machine, you get to roll it out by hand like your inner little Italian grandmother (let me know how it goes, as I’ve never tried it).

At this point – you can cut your sheets in to whatever shape noodle you want. Boil them up in heavily salted water until al dente (which will only take a minute or two) and toss with your favorite sauce/oil/fixins/what-have-you.

Or, you could make………


UP NEXT; Goat Cheese Ravioli

Tuesday, December 28, 2010

Pan Seared Beef Tenderloin

The polls are closed. The votes are in. The winner has been notified. And the latest Storm of the Century is due to pummel the Twin Cities later this week.* So I thought before the world as we know it ends (again), it would be a good time to pound out the deets of Food Night Nation’s recipe request…


* I honestly have no idea where we are going to put any more snow here. I really don't. Can someone please hit the "no vacancy" sign or something? We are full. No more room at The Inn for aaaaaaany more snow this winter. Mkay?! Great.

Food Night nation loves it some beef, apparently. Can’t say I blame you, as this preparation is a tasty as it is easy to prepare. You can go all minimalist on this bit, or you can dress it up with garnishes, fresh herbs, blue cheese, etc. But all you really need as far as equipment is; a cast iron skillet, a sauce pan, and some heat. And look at you, you’ve got ALL of those things!

And in all honesty, what you do BEFORE you begin cooking is about as important (if not MORE important) than what happens once you put pan to flame.* What are these important pre-cooking things? I count three…

*Or pan to electric coil, or pan to ceramic stove top…


Pre-Cooking Must Do #1). Buy good beef. Goes without saying, right? But more specifically, we are looking for perfect little cubes of beef tenderloin here. And if you are planning on cooking more than one, you want them to be EXACTLY the same size. Otherwise they won’t cook at the same rate, will they. So have your butcher cut you nice, even, chunks from the center of a tenderloin. Yep, the center, not the ends where the tenderloin tapers down to something too thin to cook properly. We are looking for a perfect cube-o-meat here. And how about buying your meat from a reputable source, too. Humanely raised, happy cows make the best steaks.

Pre-Cooking Must Do #2). Only room temperature meat goes in the pan. Or, perhaps I should say, meat that is right out of the fridge definitely does NOT go in the pan. Why? Think about what would happen if you took a frozen cube of meat, and tried to cook it. You’d get done/burned outsides before you had properly cooked insides. So give your steaks that you lovingly procured the proper treatment. Take them out of the fridge, sprinkle each with a little salt, and let them take a 15 or 20 minute nap on the counter prior to cooking. Your patience and planning will be rewarded.


Pre-Cooking Must Do #3). Use cast iron to cook your beef. A properly seasoned cast iron pan will give you a fabulous sear on the outside, and can go in the oven if you need to cook your steaks a little longer after you have seared both sides.

One more bit of knowledge for you before we get to the recipe… do not try to sear 17 steaks at once. When searing, the steaks enjoy a bit of elbow room. They don’t want to be all touchy-feely with the neighbor steaks, as they are a bit anti-social. Don’t try to change them, that’s just how they are. So just make sure there is plenty of unclaimed real estate in the pan during the searing process. Food Night usually only sears 4 (maaaaaaaaaybe 5 if Food Night is feeling really daring) tenderloin steaks at a time in its 12’’ cast iron skillet, if you must have a number.


Pan Seared Beef Tenderloin
Serves 2

- Two 6oz beef tenderloin steaks, of equal thickness/size/proportion, seasoned with kosher salt, rested at room temp for 20 minutes
- Oil (peanut if possible, canola/veggie otherwise, not olive oil)
- Butter
- Fresh Thyme (optional)

Heat your seasoned cast iron skillet to med-high heat. On my stove, this means turning the heat to medium, and letting the pan sit there for roughly 10 minutes. The objective isn’t to get the pan SCREAMING hot, but hot enough to make the steaks really sizzle (but not burn) when they enter the pan. Flick some drops of water into the pan, and when it sizzles vigorously, you are ready to proceed.

Toss a tablespoon or two of oil in the pan. If your oil immediately burns (you'll know if it burns...) your pan is too hot. Cool down the pan a bit, wipe out the burnt oil, and begin again. Add steaks to the pan, and sear on first side undisturbed for approx 4 minutes...


Turn steaks to opposite side (look at the killer krust you just kreated!!!!), toss in a few tablespoons of butter (more the merrier)…


… plus the optional sprigs of thyme, and sear 4 minutes.* While steak is on this second side, tilt pan and baste with butter/thyme.


*NOTE; These 4 minute times are not set in stone. Use your eyes, ears, and nose… if the steaks are burning… turn them (and turn the heat down). If they aren’t properly caramelized at 4 minutes, up the heat a bit and leave them in a bit longer. Simple.

How do you know when your steak is done? Use your finger (NOT your knife). Pressing down on the top of your steak while it’s in the pan should resemble pressing your finger against your cheek* for medium-rare. You do want your steak medium-rare… right?!

*The cheek on your FACE, please. Come on now.

If your steaks are too thick to cook solely on the stove top, you can slide the pan into a 450 degree oven. Once you’ve reached the nirvana that is a lovely medium-rare, take your steaks out of the pan and place them on a plate covered loosely with aluminum foil for 4 minutes or so. Once done, cut steaks in half, serve with red wine sauce (see below), blue cheese, and a sprinkle of Maldon sea salt. Don’t forget the Maldon.


Red Wine Sauce
1 cup good quality red wine*
1 cup stock (chicken, lamb, beef, pork, turkey, squab, rabbit… whatever)
Butter

*When we say “good quality” red wine, we mean use something here that you would enjoy drinking. If you use crappy wine, reducing it is going to concentrate and magnify its crappyness. So choose wisely, and drink the rest of the bottle with your lucky dining companion.

Combine stock and wine in small sauce pan. Reduce until it thickens slightly, you’ll be left with ½ cup or so, give or take. Remove from heat, whisk in a few pats of butter one at a time. Taste, and season with salt and/or lemon juice as needed. Bang. Done.


Time to revel in your greatness with said dining companion.

If you try this, let Food Night know how it goes! Toss out any questions in the comments too, and the Food Night staff will answer them to the best of our ability.

Tuesday, November 23, 2010

Recipe Poll and the Three Wise Men

Food Night is curious about something. Would you wonderful people like more recipes with your food and wine related musings found on these internet pages? Food Night isn’t going to turn this place in to simplyrecipes.com* or anything. But I thought I'd but up a little poll to let the people of Food Night Nation vote on what they want to see documented in recipe form from the most recent Food Night, held on 11/12/2010.


* Food Night is a big fan of simplyrecipes.com. The recipes there work. And isn’t that the best thing you can say about a recipe… that it works? Skip epicuriwhatever.com, go to simplyrecipes.com. End of endorsement.

At this "Three Wise Men and a Cook*" Food Night, we had myself (the cook), and Alex, Andy and Phil. These three gents manage various Haskells Wine & Spirits locations here in the cities, and let’s just say they have tasted a few decent bottles in their day. It was a really great group, which lends credence to a point Georg Riedel mentioned that we spoke about earlier, which was “Enjoy the company of the people you are drinking with”.

*Please do not confuse this recent Food Night with this…


Similar… but different. Remember when Steve Freaking Guttenberg was a big deal for like 17 minutes? Cripes am I getting old.

So anyway, you don’t have to have an encyclopedic knowledge of the Burgundy vintages from 1992 to 1995 or some such B.S. to enjoy Food Night, or any dinner party. Just enjoy the people you are hangin' with! Heck - I was an infant Skywalker compared to the The Wise Mens' collective Yoda when it comes to wine knowledge and tasting history. But just listening to the banter and observations about wine from people who KNOW is extremely fun and educational.

And now, the candidates, for your consideration...


Scallops Two Ways
Carpaccio & Seared. Pork belly. Salsa verde. Black olive oil.


Autumn Soup
Squash. Apple. Beet. Brown butter.


Ravioli
Sheep’s Milk Ricotta. Squash. Brown butter. Sage.


Beef Tenderloin
Red Wine. Lamb Stock. Blue Cheese.


Unleash the Voting!

Tuesday, November 16, 2010

At Long Last... the Emergency Food Night, starring Hollandaise Sauce, and a Beet Soup Recipe

Remember the EMERGENCY Food Night, when Tyler Durden came to town? Of course you don’t. It happened in June. Heck, I barely do. BUT – via my magic picture taking machine, allow me to regale you (in as much detail as possible) with what went down at Durden’s Emergency Food Night.


As an added bonus, let’s toss in a recipe, related to said Emergency Food Night and to the WILDLY successful initial “Food Night Poll”… as seen on the right side of this interweb page. Food Night likes beets, and wants you to like them too. Beets get a bad rap I think because lots of people grew up eating icky canned beets at school lunch in 2nd grade. See, if you don’t like beets, I’m thinking perhaps you and beets just didn’t start off on the right foot. The recipe at the end of this post… is the right foot. Deets upcoming… but first… one thing I DO remember about this Food Night was that it was an absolutely EPIC evening outside…


So epic in fact, that we had a Food Night First… Course #1 was served outside, on the Food Night Mansion’s spiffy new patio furniture. This first course was a salad I learned from a cookbook that I stole got from my folks called “Cypress”. It’s the companion book from a restaurant of the same name that they enjoy visiting in Charleston, SC. I hope to make it there someday, but until then… I used the book as inspiration for this little ditty…


Very simple and elegant. Take an English cucumber to a mandolin, the long way, so you get long strips. Then just form a ring with said cuke strip, and BANG! Your salad container is ready. Toss some farmers market greens with some herbs (tarragon, dash of julienned mint, lemon thyme) and a vinaigrette. Then for the hell-of-it, I painted* a stripe on the plate to lend some added visual appeal.


*Yes, I did use an actual paint brush. No, said brush is not used for anything other than painting plates.

The “paint” was actually the next course…


BEET SOUP! Your favorite beets, lovingly roasted, and pureed into a silky soup! Only one issue with my particular execution of this soup… it was a titch* spicy. We like spice at Food Night. After all, "spice" is the spice of life, right? Or something. Anyway, spice doesn’t always play well with the wines at Food Night, so we try to strike a balance in the spice department. Obviously we don't want to demolish our uber-deece wines with too much heat, right?

*Titch = ½ of a Tad

To combat the titch of excess heat, I chilled the soup overnight, added a little sugar which tends to mellow the heat a bit, and served the soup chilled, too. This resulted in the final product being only sliiiiiightly more spicy than I intended; an acceptable result for an off the cuff Beet Soup (recipe follows).

Rounding out the lineup of dishes, was one of the most rewarding things I’ve ever made. Salmon cakes with……………….. hollandaise sauce! Holy MOLY was this hollandaise fabulous, the recipe and inspiration from the ever inspiring Michael Ruhlman. I decided to take a leap of faith, and attempt this sauce for the first time live-without-a-net, during Food Night. No practice run. No backup sauce. Nada. Just… get it RIGHT… the first time. Which after some whisking… ok, a lot of whisking…


… it was not only right, it was heavenly. It was like yellow ribbons of rich lemony silky goodness enveloping the (oh by the way) French Laundry inspired salmon cakes with grilled lemon. While there would certainly be nothing wrong with this dish without the hollandaise…


... WITH the hollandaise… well, you could say the dish sounded its BARBARIC YAWP over the rooftops of the world.*


* Thanks, Uncle Walt Whitman. I had forgotten about that scene in "Dead Poets Society" until I tried to describe yummy hollandaise sauce (now there is a sentence you never thought you'd read in your life, right?!) I don't even think I knew what hollandaise sauce was when I first saw that movie. But anyway, invest the 2 minutes and check out that scene. Great stuff.

The lesson here is… make hollandaise. You can do it. You absolutely can do it. And your life will taste better as a result.

The final course was a second iteration of Sameh’s cucumber broth, this time with salmon instead of halibut, and crème fraiche with pickled tomato instead of yogurt. Not shabby.


My favorite dish? The Salmon Cakes. That hollandaise was so rewarding. But what do I want you to take from this Food Night? Beets. Yes, beets. Beets are your friend. Roast them, saute some aromatics, toss them in the pot with some wine and/or water, garnish… and you’ll have beauty in a bowl.

Beet Soup

Beets – red, one pound or more
1 small onion, chopped
1 or 2 cloves garlic, thinly sliced.
Carrot/celery – chopped (optional)
Ginger - peeled, chopped
White wine or sherry or madiera or…
Bay leaves
Guajillo chile – optional (lends spice and earthyness)
Salt, lemon juice, brown sugar; for seasoning
Crème fraiche, quality blue cheese, chives; for garnish

Line an oven going sheet pan with tin foil. Toss beets in olive oil and roast in sheet pan in a 425 degree oven, approximately 60-75 minutes, tossing the beets every 20 minutes or so, until tender. Peel (your fingers probably will want them to cool a bit), and chop into chunks.

While beets roast, sauté your onion to your desired doneness (lightly translucent, or caramelize the hell out of it… it’s a free country). Toss in the garlic, and carrot/celery if using. Saute for a bit and add the ginger toward the end. Gently salt each addition to the pot, remembering you can always add more later. Deglaze pot with wine or sherry or water and reduce.

Add peeled beet chunks, and cover by an inch or so with water, and season with salt. Add (optional)chile and bay, and simmer partially covered for at least 30 minutes. Remove chile and bay. Puree. Adjust consistency of soup as needed, by either reducing to thicken, or adding water to thin. Check for seasoning, adding salt, and lemon juice as needed. Use sugar in 1tsp increments to tame heat a bit if necessary.

Serve chilled or warm, garnished with a spot of blue cheese, crème fraiche thinned with lemon juice or water, and chives.